I've Been Using My SteamOS Box To Play... Uh... Nintendo Games.
I've ranted before about how non-open SteamOS is in practice, even though it's built on an open-source OS. Well, fortunately, some clever hackers have found ways to customize the gaming-centric operating system, making it one of the better choices for a general-purpose big screen user interface... especially if you are like me and love your retro gaming as much as your modern gaming.
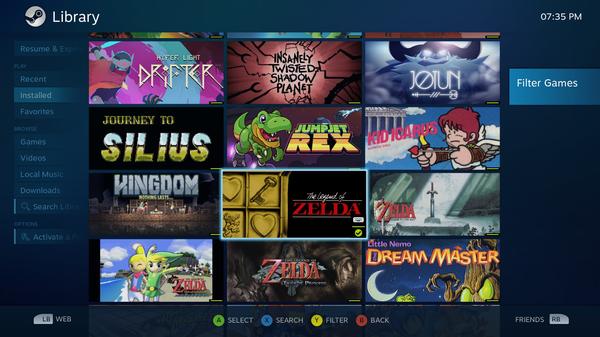
Enter Ice, a command line utility that can be used on any Steam-capable computer to add your roms to Steam as their own entries in your game list. On the surface, Ice might seem a bit redundant, because on a PC, you generally just fire up an emulator and pick a rom from the list within its user interface. Where Ice really shines, though, is in a system where Steam is the primary way you interact with your game library; making it an ideal fit for SteamOS. The beauty of Ice is that it will even fetch “cover images” for each game as it adds them to your library, the result being that your emulated games feel right at home next to your Steam collection.
The second piece of the puzzle is the SteamOS-Tools project, which aims to simplify adding various user-made customizations to SteamOS. It is this project that fully automates the integration between Ice and Steam: Normally Ice requires some text-file-based configuration, but the version packaged in the SteamOS-Tools repository includes those files pre-baked for a SteamOS setup.
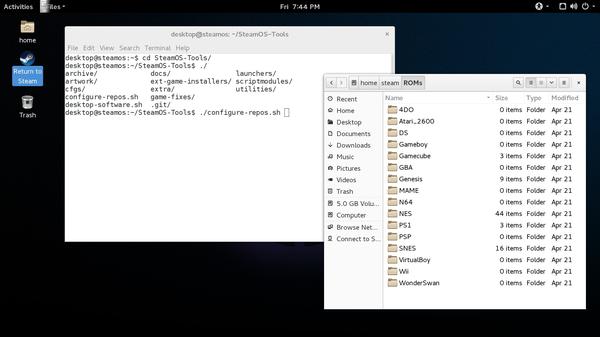
So the first step was to enable the Linux desktop on my Steam Box. I accomplished this by going to the settings menu and enabling access to the Linux desktop under the Settings > Display > Interface section. Then I needed to set up a password for the desktop user. So I switched to desktop mode (the option to do so appeared under the "power" menu), opened a terminal window, and typed “passwd”, which prompted me to set a password for the desktop user. In the same terminal window, I then installed Git, which is a version control system, and in this case is used just to fetch (and update) the contents of the SteamOS-Tools repository. Here are the commands to install Git and then clone yourself a copy of the entire suite of SteamOS-Tools:
#install git
sudo apt-get install git

#clone a local copy of SteamOS-Tools
git clone https://github.com/ProfessorKaos64/SteamOS-Tools.git
Then I entered into the directory created by Git and installed the SteamOS-Tools software repository. Not to be confused with the SteamOS-Tools repo, this is a Debian software repository which contains pre-built software packages and integrates with SteamOS's package manager, Apt, thus allowing the installation of additional software. In this case, that software is Ice and a collection of emulators:
#move into the SteamOS-Tools folder
cd SteamOS-Tools/

#add the SteamOS-Tools software repository to the system
sudo ./configure-repos.sh

#Install Ice and the associated emulators
sudo apt-get install ice-steamos
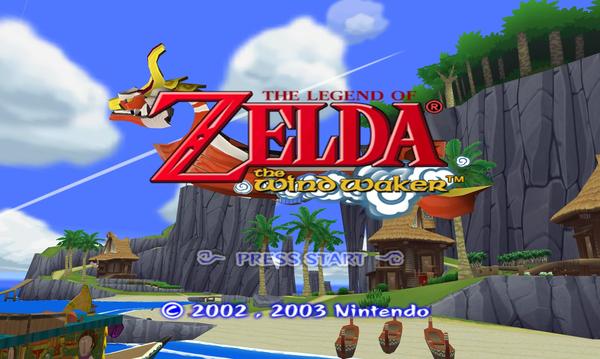
Running this last command installs not just Ice, but also a collection of emulators which Ice is configured by default to use. Most of these emulators use the LibRetro library, which for the end-user simply means that they are very minimal (they have no GUI) and don't require any configuration (gamepads in particular). The one exception to this is Dolphin, which does not currently have a LibRetro version and, as such, does require some manual setup... which I'll get to later.
With Ice installed, I followed the instructions on the SteamOS-Tools wiki to run Ice for the first time, which will create directories under the Steam user where you will place your rom collection. There are two important points in the instructions to note: First, you have to stop Steam temporarily while you run Ice, and second, you have to run Ice as the Steam user, not the desktop user. Similarly, you must move your roms into the "Roms" folder structure created under /home/steam, not under /home/desktop. It was at this point that I used one of my favorite do-it-all Linux utilities, SSH, to move a handful of rom files over to the Steam Machine and put them in the appropriate location. (This is the part where I encourage the reader to make sure you actually own a real copy of all the games you play with this setup. Yeah, please do that.)
It turns out that SSH is not installed by default on SteamOS, so I installed it with the following command:
#install the OpenSSH Server
sudo apt-get install openssh-server
Then I was able to use SCP (a sister command to SSH) to copy the roms I wanted over to the SteamOS box, using commands such as:
#to copy a single file
scp "Roms/SNES/Star Fox.smc" desktop@steamos:/home/desktop/Roms/SNES/

#or to copy a whole folder
scp -r "Roms/SNES" desktop@steamos:/home/desktop/Roms/

#or to use Rsync to sync an entire rom library
rsync -avz -e 'ssh' --delete "$HOME/Roms/" desktop@steamos:Roms/
(I realize most of you use Windows, so WinSCP is a good windows-based option for file transfers via SSH.)
One thing that was a bit annoying: I had to rename all of the roms I wanted available in Steam so that the filename is identical with the actual title of the game, because Ice can't properly fetch the cover image for a game if it is mis-named. That was tedious, but I went ahead and did it because I figured I wasn't going to put every rom in there, just games I actually play, which ended up being in the ball park of 50 games or so across all systems. At first, of course, I picked a handful of games from a few systems to test the setup with.
After organizing a subset of my rom collection, I ran Ice one more time, confirmed that it detected the roms I'd placed in the appropriate folders, and started Steam back up. Upon returning to the Big Picture interface, I was pleasantly surprised to see that those games Ice detected were added to my library! Not only that, they ran without any trouble! (If you've messed with emulators before, especially on Linux, you might be able to understand my surprise.)
I expected that I'd need to do some gamepad tweaking, and I did. Even though out of the box the emulators saw the gamepads, there is a particular setup I like for platformers since the Steam controller doesn't have a true D-Pad (one of my main complaints about it). So I created a “preset” for one game and I was able to recall that preset from any other game. I had to make the preset public before I could use it in any other games, which was a bit odd... Being able to create your own generic, global gamepad presets without making them public would be a nice Steam Controller feature.
Dolphin, as I mentioned, was a special case, since it does not use the LibRetro library to automatically detect gamepads. So in order to get it working properly, I figured I could start Dolphin under the Linux desktop, configure the gamepad like I normally would, and then copy Dolphin's configuration from the desktop user to the Steam user. The problem with that approach, however, is that when in the Linux desktop, the gamepad acts as the mouse… meaning that when I tried to bind the right-trackpad or any button being used by the desktop, Dolphin thought I was binding mouse movements and buttons, rather than gamepad functions... which of course wasn't going to work correctly. To get around this, I ended up configuring Dolphin on my desktop PC using an Xbox controller and copying the configuration over to the Steam Machine (again via SSH). Convoluted, yes, but it worked!
Another caveat I ran into was that if an emulator does not gracefully exit, the game's battery-backed ram will not properly be saved, and I'll lose my progress. Unfortunately when you press the Steam button and select “Quit Shortcut” to kill the emulator, it does not perform a graceful shutdown. I played the intro to Super Metroid several times, subsequently losing my progress each time, before I realized how to resolve this. After some playing around, I found that I had to bind the “escape” key to a particular set of buttons on the gamepad (not a common combination, so that I don't accidentally bump it) so that I could exit properly.
After all of this, you might be thinking, “well that sounds like a lot of work, is it really worth it?” To be honest, I was pleasantly surprised by how easy it all was. Yes I've got a Linux background, but it's really a fairly simple operation and a good way to get your hands a bit dirty with the Linux command line. It's been absolutely worth it for me, because now I only need a single box connected to my TV for all of my casual retro and modern couch gaming needs.
This was originally written for, and featured on, KBMOD.com
Modified Wednesday, February 19, 2025


