Truck Transmission Swap
I'm converting my '95 Dodge 12-valve from an automatic (47RH) to a standard (NV4500). Here's how it's going.
This is a project-in-progress, it will be updated as it nears completion.
Day 1 (Sept 17th)
I decided that it was finally time to dig into the truck transmission swap project. The new transmission (a rebuilt NV4500) has been sitting in the garage since spring time and I knew I would not want to work on it once the weather got really cold. So without thinking too much about it, I dug in.
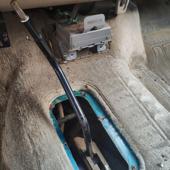
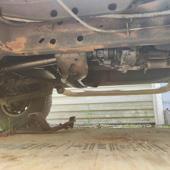
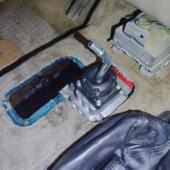
First, off came the transfer case shifter boot, and the shifter knob came off after realizing I had to pop the cover off the top with a screwdriver to reveal the nut holding it on underneath. Then I dropped the skid plate that protects the transfer case. Fortunately, this engine leaks some oil so the truck is constantly undercoating itself... all the bolts I removed came out pretty easily.
Then I removed the rear driveshaft (not a big deal on standard-cab trucks since there's no carrier bearing in the middle), and started working on the front driveshaft. For the life of me, I could not get the front driveshaft to pop off the transfer case output shaft, so I ended up leaving it on for now and poppling it off later once I could get a better angle on it.
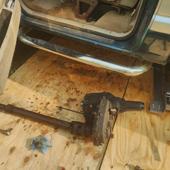
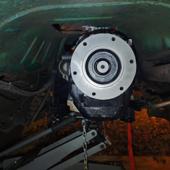
Finally, after draining the transfer case and disconnecting the shift linkage, VSS wire, and vacuum + breather hoses, I dropped the transfer case using the transmission jack I had picked up from Harbor Freight. This had already been a long day so I decided to dolly the t-case into the garage and call it here.
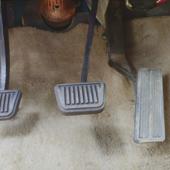
Prior to today, what I had done was replace the pedal assembly with one that has a clutch pedal (though I didn't get pictures until today). I figured it was something I could get done without having to stop driving the truck. The new pedal assembly is one that I found on eBay (they are getting very expensive on there but this one appears to be in basically new condition so I can't really complain).
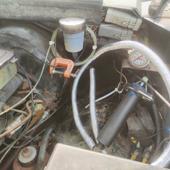
Along with the clutch from South Bend, I also got a pre-filled master & slave cylinder combo, which I also installed. For now, I didn't connect the pedal to the master cylinder because I didn't want to accidentally push the pin all the way out of the slave and lose all the fluid. It went in really easily, with the most tedious part being having to re-route all the wires that I (and the previous owner) had fed through the hole where the master is meant to go. I also temporarily moved my fuel pressure gauge to a bracket under the hood, since I'll incorporate it into a full gauge cluster that I'll be building for my EGT and boost gauges.
Day 2 (Oct 8th)
There was another day in between the last section and today when I worked on removing the transmission cooler lines and shifter linkages... I took my time because I wanted to be able to save & sell them (I know they're getting harder to find).
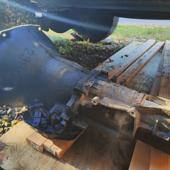
Today, after attending Bantam Trailfest, I managed to get the transmission dropped. I have to admit it was a little bit precarious. Let's just say the chain they supply with a transmission jack is pretty much useless, and I should have ratchet-strapped it to the jack.
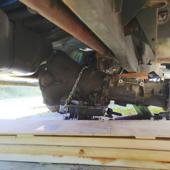
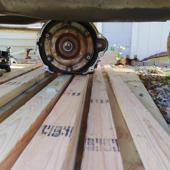
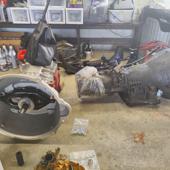
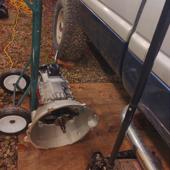
Regardless, I got it down, and the biggest challenge of the day ended up being figuring out how to get the transmission out from under the truck. My solution involved jacking up the truck by a few inches, and sliding the transmission onto progressively shorter stacks of 2x4's until I could get it all the way down onto the plywood.
Day 3 (Oct 26th)
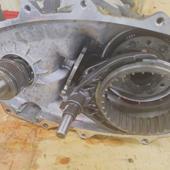
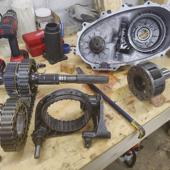
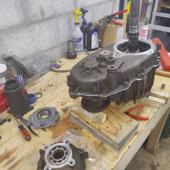
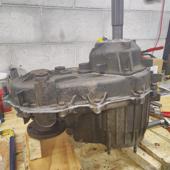
Short day today. The next step in the swap is to replace the old 23-spline input shaft on the NP241 DLD transfer case with a 29-spline that would mate up with the NV4500. That involves a partial tear-down of the transfer case, so I popped the rear housing off of it and quickly realized I was going to need retaining clip pliers to continue. Since time is extremeny precious these days (see: 3 month old baby) and a trip into town seemed too difficult to pull off, I decided to take care of some much needed garage cleanup and order the pliers and a few other tools online. It ended up working out because if I hadn't cleaned the work bench I wouldn't have had room to tear down the transfer case.
Day 4 (Nov 3rd)
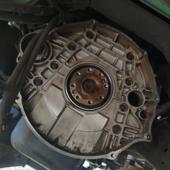
First order of the day was to remove the old flex plate from the crank shaft and replace the rear main seal. I took the lazy man's (somewhat risky) way out and instead of removing the whole adapter plate, per the internet's advice I drilled two small holes in the old seal, partially drove in two small machine screws, and carefully inched the seal out with a pair of vice grips and a crow bar. Putting the new seal in was relatively straightforward, though the tool they provide to drive the seal on is designed to be used without the adapter plate present, so it takes a bit of finesse to make sure the seal is actually all the way in.
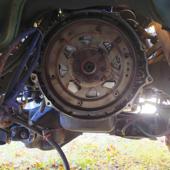
After cleaning the end of the crankshaft and waiting the recommended 4 hours to let the seal adapt to the crankshaft, I decided to mount up the new flywheel and start the truck to make sure the seal was installed correctly. I definitely underestimated how difficult it would be to hold up the flywheel and hand-start the flywheel bolts, but I did eventually succeed. I was able to start the truck by grounding the neutral safety switch (the middle pin on the round 3-pin connector that was previously plugged into the side of the old transmission)... this confirmed that I'd have to wire that pin up to the switch on the clutch pedal to prevent the truck from starting until the clutch is pressed in.
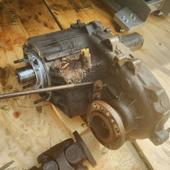
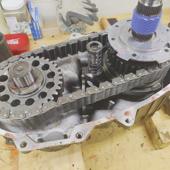
My retaining clip pliers had arrived, so I then got to work tearing down the transfer case the rest of the way. Tearing it down was the easy part.
Day 5 (Nov 4th)
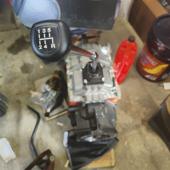
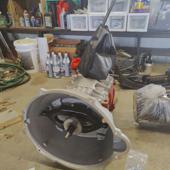
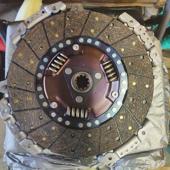
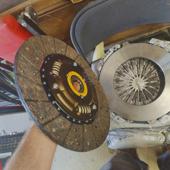
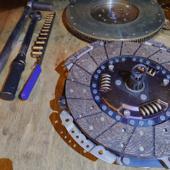
I didn't make a whole lot of progress today, but I decided that I would work on assembling the new transmission as much as I could. I mounted up the bell housing, clutch fork and release bearing, and put the shift tower on so that I could test out the gears. I got out and examined the friction plate and pressure plate, but I had run out of brake parts cleaner cleaning the crankshaft, so I couldn't mount them up on the flywheel just yet.
Day 6-7 (Nov 6-7th)
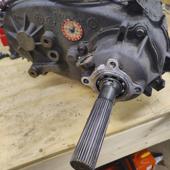
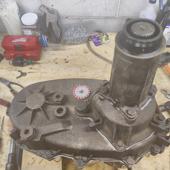
Reassembling the transfer case ended up being a bit more involved than I thought. The replacement input shaft was easy enough to get installed, but for some reason the retaining clip that holds it in place didn't seem to be working with the old input bearing (it was too thick and I just couldn't get it to seat). So my thought was, maybe I had to replace the bearing too... the 29-spline came with a new bearing, after all. Eyeballing it, I thought that maybe the new bearing was a bit shorter. So I got to work driving out the old bearing. The hard part was driving the new one in... I had to carefully construct a plaftorm out of scrap wood that would hold the transfer case level while putting pressure evenly on the bearing so that it went in straight.
Once the new bearing was in place though, I found that the retaining clip still wouldn't fit. So I ended up firing up the bench grinder and grinding a tiny bit of material off the clip to make it thin enough to work. In hindsight, I'm really hoping that I didn't compromise the clip's strength by grinding it. Retaining clip's aren't supposed to directly take much stress to begin with, so I think it'll be fine. Time will tell, I suppose.
The second big setback with the reassembly came, unfortunately, after I had applied RTV sealant and hand-tightened the bolts and was waiting for the seal to set up. I realized that the oil pump, which has to be slid onto the main shaft, would just not mate up with the oil pickup tube while the case was together no matter what I tried. So I had to undo the bolts and pop the housing open, and clean up a whole bunch of wasted RTV sealant. I then applied a new bead of RTV, held the oil pump in place with the dip dube inserted, and slid it on while holding it all together. Fortunately, this worked and it all went back together.
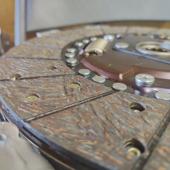
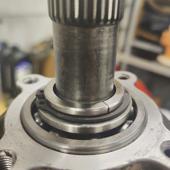
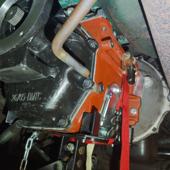
Before I put the rear housing on, instead of reinstalling the old retaining clip (which I could see was already getting damaged), I used the Sonnax split-ring retainer kit to hold the main shaft in place (picture 3).
Day 8 (Dec 1)
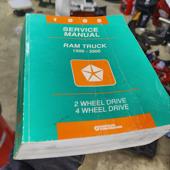
After not finding clear answers in either the Haynes manual nor countless diesel truck forums, I broke down and ordered the factory service manual for the truck so that I could get some actual factory torque specs. I'm glad I did, because while the flywheel bolt torque recommended in several places (55 ft-lbs) was correct for the gas engine, the spec for the diesel engine is 101 ft-lbs. Also, I read one guy's posts where he was replacing the pressure plate (called the "clutch cover" in the FSM), and got bad torque specs from somewhere and kept breaking bolts. So for reference, the FSM says the pressure plate torque bolts should be torqued to 17 ft-lbs if they're 5/8" (which mine are). Of course I used lock tite on them, too.
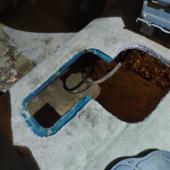
After some very careful measurement, I also got the hole cut in the floor of the truck for the shifter. I took a bit of a gamble and took a handful of measurements from different points on the new transmission, made a hole template out of a piece of cardboard (I'm officially an advocate of "cardboard aided design"), traced it and cut the hole using a jigsaw.
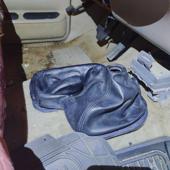
Then, in a moment of rare mental clarity, I thought to look for a shifter boot on eBay. There were actually two listed specificlly for a 95 truck with an nv4500. So I ordered one and as luck would have it, it will cover the hole I cut perfectly -- if anything I may have to cut out a bit more, but that's worlds better than cutting out too much. Finding a factory boot made me very happy because otherwise it was going to be quite a challenge making an aftermarket boot not look like a total hack job.
I also found out what happens when you mount up the flywheel and then don't return to the project for a few weeks. It had a very disheartening layer of rust growing on it when I looked at it a few days ago. Scouring the internet, many people were saying a flywheel should be turned down at a machine shop if it's rusty. Fortunately the FSM saved me again, as it specifically says a thin layer of rust can be sanded off with 180 grit sandpaper on a sanding block. So I did that, cleaned it with several applications of bra-kleen, and got it mounted up and torqued down w/ lock tite for real. Then I got the clutch disk and presure plate cleaned, mounted and torqued down as well. At this point I'm fairly certain the next step will be to get the nv4500 actually up under the truck and mounted up to the engine.
Day 9 (Dec 2)
Well... she's in.
I definitely could not do this part myself. I recruited my brother-in-law Jesse to help lift the transmission up onto the jack, and even with both of us it was about all we could do. Unfortunately lifting it onto the jack while under the truck was the only option though, as I don't have a way to jack the truck up more than a few inches and it barely fit under even when it wasn't on the jack.
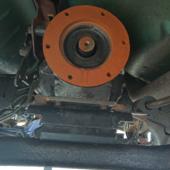
Thankfully the hole I cut was perfect... too perfect. It didn't allow any space for the process of sliding the transmission into place. So, I had to cut a bit more of the floor out (the hole will still be covered by the boot). Eventually, with a lot of adjusting, wiggling, and rotating the engine with a screwdriver to get the splines lined up, it finally slid into place. We quickly threaded in the mounting bolts and snugged them up a bit with a ratchet. I will have to pull the bolts each back out and apply lock tite, then torque them down... but after all that struggling I didn't want it going anywhere.
Before calling it a night, I placed a jack stand under the end of the transmission to keep it supported until the next work day. Which will be who knows when.
Day 10 (Dec 20)
Sorry, no pictures today.
Some day between the last section and today, I managed to get the hand-tight bellhousing bolts torqued town and the slave cylinder installed, and tested out the clutch. All working, as far as I can tell... though I guess I won't know for sure until the engine is spinning again. Speaking of which... in the next few days, I will need to start it up to get some diesel fuel anti-gel additive into the fuel lines and filter before the crazy cold snap that's just around the corner.
Today, I fixed the broken VSS (vehicle speed sensor) bracket bolt that had broken off by drilling out the hole and re-tapping the threads. I don't do thread tapping very often so I'm happy it worked out ok.
The other item I checked off the list is re-mounting the cross member which holds up the rear of the transmission. I also cut the old mounting bracket so that it will line up correctly on the rear housing of the NV4500, but I'm fairly certain the bracket is too tall and will need to be cut down and welded back together. I don't have a welder (yet!) but I'll hopefully recruit some help for that and get some pictures, as that might be useful info for someone else doing the swap.
More to come.
Day Whatever (Apr 20, 2023)
Road-worthiness accomplished.
I guess I should back up a bit. As the little one grew, it became harder and harder to find time to work on the truck. No problem, just taking even longer than expected. But it also means not as much time for documentation. So here's what has happened in the last 4 months.
First, my friend Curt was able to modify the transmission mounting bracket. Instead of cutting up the existing platform, he figured it would be easier to cut the legs off the old one and weld them to a fresh piece of plate steel. It worked like a charm, and will be plenty strong. I used a piece of cardboard to locate & drill the holes on the bracket, and got the transmission mounted on it. Felt good to finally remove the jack stand that's been holding it up!
Of course, it couldn't be that simple. Apparently, from sitting out for 4 months, the threads on the mounting holes rusted, and when I torqued down the bolts, one of them got soft and stripped out. So, that will be on the list of things that I have addressed by the shop that will inspect the truck later this month. I'm hoping they can drill it out and tap it with larger threads and put bigger bolts in both mounting holes.
Second, while Curt had the mounting bracket, I figured I could tackle the wiring. Fortunately that turned out to be pretty simple. There is a 3-pin plug that went in the side of the old transmission, and the center pin is the "neutral safety switch". It has to have a connection to ground to allow the truck to start. Originally, I figured I'd have to run that connection through the cluth safety switch to re-enable the manual-equivalent functionality, but it turns out there is already a connector in place next to the clutch pedal for exactly that. So I simply found a good place to ground the neutral safety wire and that was that. The same plug also has the reverse lights, and they had to be wired up to the sensor on the new transmission. But again, that was pretty straightforward.
After I got the mounting bracket installed, I was able to mount up the transfer case (easier said than done) and get a driveshaft measurement. Yes, I ended up having to modify both of them. Fortunately my brother knew of a nearby shop that could do it, and it only took them a few days. I also reconnected the vacuum lines for the front axle locker, and did a bit of wire & fuel line management (I replaced the lines a while ago but never really mounted them up cleanly).
The results, and more to-dos
With the rear driveshaft in, I was feeling unusually brave and decided I would do a test drive. Sure enough, it moved! And though I have almost no experience driving a stick, I managed to get it around the block and back home without stalling.
A few days later, I continued tidying up my work, fastened down the shifter boot, and drove it again, this time for about a half hour around some back roads. I knew it would feel like a totally different truck, but man does it drive well. The clutch is very grabby, but I assume that's because it needs broken in (and it's probably a bit rusty again).
There are plenty of loose ends to tie up yet, but it's hard to overstate the satisfaction of getting her back on the road. She's up for inspection this month so it all came together just in the nick of time.
Modified Friday, April 28, 2023
